OpenLayers入门(一) - 知乎
<!DOCTYPE html>
<html lang="en">
<head>
<meta charset="UTF-8">
<meta http-equiv="X-UA-Compatible" content="IE=edge">
<meta name="viewport" content="width=device-width, initial-scale=1.0">
<title>Document</title>
<!-- 1.导入ol依赖 -->
<link rel="stylesheet" href="https://lib.baomitu.com/ol3/4.6.5/ol.css">
<script src="https://lib.baomitu.com/ol3/4.6.5/ol.js"></script>
<style>
.ol-zoomslider {
top: 7.5em;
}
</style>
</head>
<body>
<!-- 2.设置地图的挂载点 -->
<div id="map">
</div>
<script>
// 3.初始化一个高德图层
const gaode = new ol.layer.Tile({
title: "高德地图",
source: new ol.source.XYZ({
url: 'https://webrd01.is.autonavi.com/appmaptile?lang=zh_cn&size=1&scale=1&style=8&x={x}&y={y}&z={z}',
wrapX: false
})
});
// 4.初始化openlayer地图
const map = new ol.Map({
// 将初始化的地图设置到id为map的DOM元素上
target: "map",
// 设置图层
layers: [gaode],
view: new ol.View({
center: [114.30, 30.50],
// 设置地图放大级别
zoom: 14,
projection: "EPSG:4326"
})
})
// 视图跳转控件
const ZoomToExtent = new ol.control.ZoomToExtent({
extent: [126.4, 45.7, 126.7, 45.9]
})
map.addControl(ZoomToExtent)
// 放大缩小控件
const zoomslider = new ol.control.ZoomSlider();
map.addControl(zoomslider)
// 全屏控件
const fullScreen = new ol.control.FullScreen();
map.addControl(fullScreen);
// 1.通用样式信息和几何信息构建点要素
// 几何
const point = new ol.Feature({
geometry: new ol.geom.Point([126.5350, 45.8021])
});
let style = new ol.style.Style({
// image属性设置点要素的样式
image: new ol.style.Circle({
// radius设置点的半径 单位degree
radius: 10,
fill: new ol.style.Fill({
color: "#ff2d51"
}),
stroke:new ol.style.Stroke({
width:2,
color:"#333"
})
})
})
point.setStyle(style);
// 2.将要素添加到矢量数据源
let source = new ol.source.Vector({
features: [point]
})
// 3.将矢量数据源添加到矢量图层
let layer = new ol.layer.Vector({
source
})
// 4.添加矢量图层到地图容器
map.addLayer(layer)
</script>
</body>
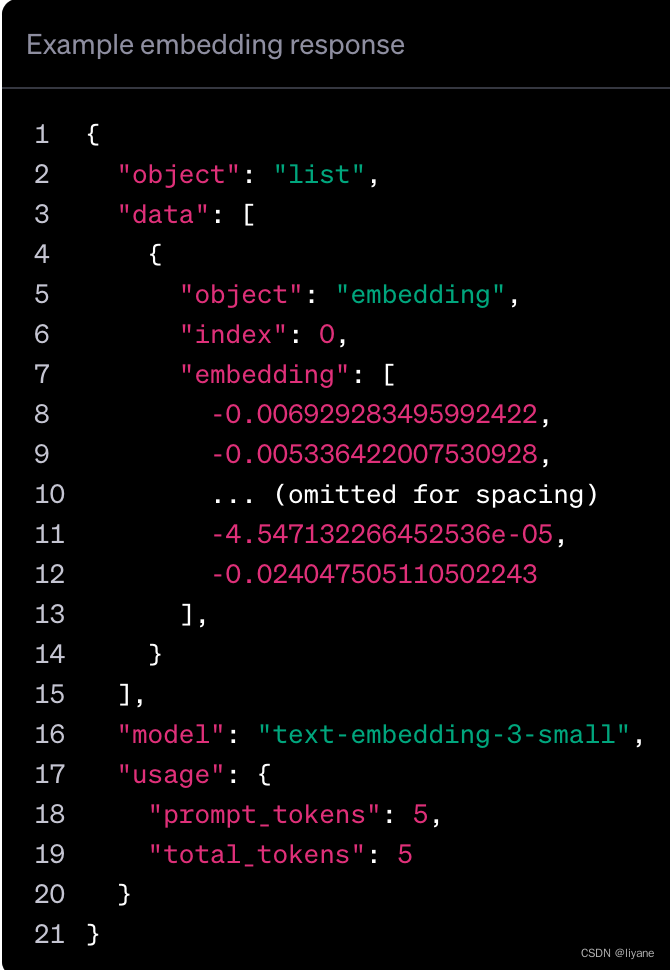
</html>geojson

<!DOCTYPE html>
<html lang="en">

<head>
    <meta charset="UTF-8">
    <meta http-equiv="X-UA-Compatible" content="IE=edge">
    <meta name="viewport" content="width=device-width, initial-scale=1.0">
    <title>Document</title>
    <!-- 1.导入ol依赖 -->
    <link rel="stylesheet" href="https://lib.baomitu.com/ol3/4.6.5/ol.css">
    <script src="https://lib.baomitu.com/ol3/4.6.5/ol.js"></script>
    <style>
        .ol-zoomslider {
            top: 7.5em;
        }
    </style>
</head>

<body>
    <!-- 2.设置地图的挂载点 -->
    <div id="map">

    </div>
    <script>
        // 3.初始化一个高德图层
        const gaode = new ol.layer.Tile({
            title: "高德地图",
            source: new ol.source.XYZ({
                url: 'https://webrd01.is.autonavi.com/appmaptile?lang=zh_cn&size=1&scale=1&style=8&x={x}&y={y}&z={z}',
                wrapX: false
            })
        });

        // 4.初始化openlayer地图
        const map = new ol.Map({
            // 将初始化的地图设置到id为map的DOM元素上
            target: "map",
            // 设置图层
            layers: [gaode],
            view: new ol.View({
                center: [114.30, 30.50],
                // 设置地图放大级别
                zoom: 14,
                projection: "EPSG:4326"
            })
        })
        // 视图跳转控件
        const ZoomToExtent = new ol.control.ZoomToExtent({
            extent: [126.4, 45.7, 126.7, 45.9]
        })
        map.addControl(ZoomToExtent)

        // 放大缩小控件
        const zoomslider = new ol.control.ZoomSlider();
        map.addControl(zoomslider)

        // 全屏控件
        const fullScreen = new ol.control.FullScreen();
        map.addControl(fullScreen);


        // 创建geojson数据
        var data = {
            type:"FeatureCollection",
            features:[
                {
                    type:"Feature",
                    geometry:{
                        type:"Point",
                        coordinates:[114.30,30.50]
                    }
                }
            ]
        }
        // 将数据添加到矢量数据源中
        var source = new ol.source.Vector({
            features:new ol.format.GeoJSON().readFeatures(data)
        })
        // 设置矢量图层
        var layer = new ol.layer.Vector({
            source
        })
        const style = new ol.style.Style({
            image:new ol.style.Circle({
                radius:10,
                fill:new ol.style.Fill({
                    color:"#ff2d51"
                }),
                stroke:new ol.style.Stroke({
                    color:"#333"
                })
            })
        })
        layer.setStyle(style)
        // 添加矢量图层到地图容器
        map.addLayer(layer)
    </script>

</body>

</html>
<!DOCTYPE html>
<html lang="en">
<head>
<meta charset="UTF-8">
<meta http-equiv="X-UA-Compatible" content="IE=edge">
<meta name="viewport" content="width=device-width, initial-scale=1.0">
<title>Document</title>
<!-- 1.导入ol依赖 -->
<link rel="stylesheet" href="https://lib.baomitu.com/ol3/4.6.5/ol.css">
<script src="https://lib.baomitu.com/ol3/4.6.5/ol.js"></script>
</head>
<body>
<!-- 2.设置地图的挂载点 -->
<div id="map">
</div>
<script>
// 3.初始化一个高德图层
const gaode = new ol.layer.Tile({
title: "高德地图",
source: new ol.source.XYZ({
url: 'https://webrd01.is.autonavi.com/appmaptile?lang=zh_cn&size=1&scale=1&style=8&x={x}&y={y}&z={z}',
wrapX: false
})
});
// 4.初始化openlayer地图
const map = new ol.Map({
// 将初始化的地图设置到id为map的DOM元素上
target: "map",
// 设置图层
layers: [gaode],
view: new ol.View({
center: [114.30, 30.50],
// 设置地图放大级别
zoom: 14,
projection: "EPSG:4326"
})
})
// 区域要素
// 设置line要素的geojson数据
var data = {
type:"FeatureCollection",
features:[{
type:"Feature",
geometry:{
type:"LineString",
coordinates:[
[114.30,30.50],
[116,30.31]
]
}
},{
type:"Feature",
geometry:{
type:"Polygon",
coordinates:[[
[114.30,30.50],
[116,30.50],
[116,30]
]]
}
}]
}
// 设置矢量数据源读取数据
let source = new ol.source.Vector({
features:new ol.format.GeoJSON().readFeatures(data)
})
// 设置矢量图层
let layer = new ol.layer.Vector({
source
})
let style = new ol.style.Style({
// stroke线设置样式
stroke: new ol.style.Stroke({
color:"#ff2d51",
width:3
}),
fill:new ol.style.Fill({
color:"rgba(50,50,50,0.3)"
})
})
layer.setStyle(style)
// 添加到地图容器
map.addLayer(layer)
</script>
</body>
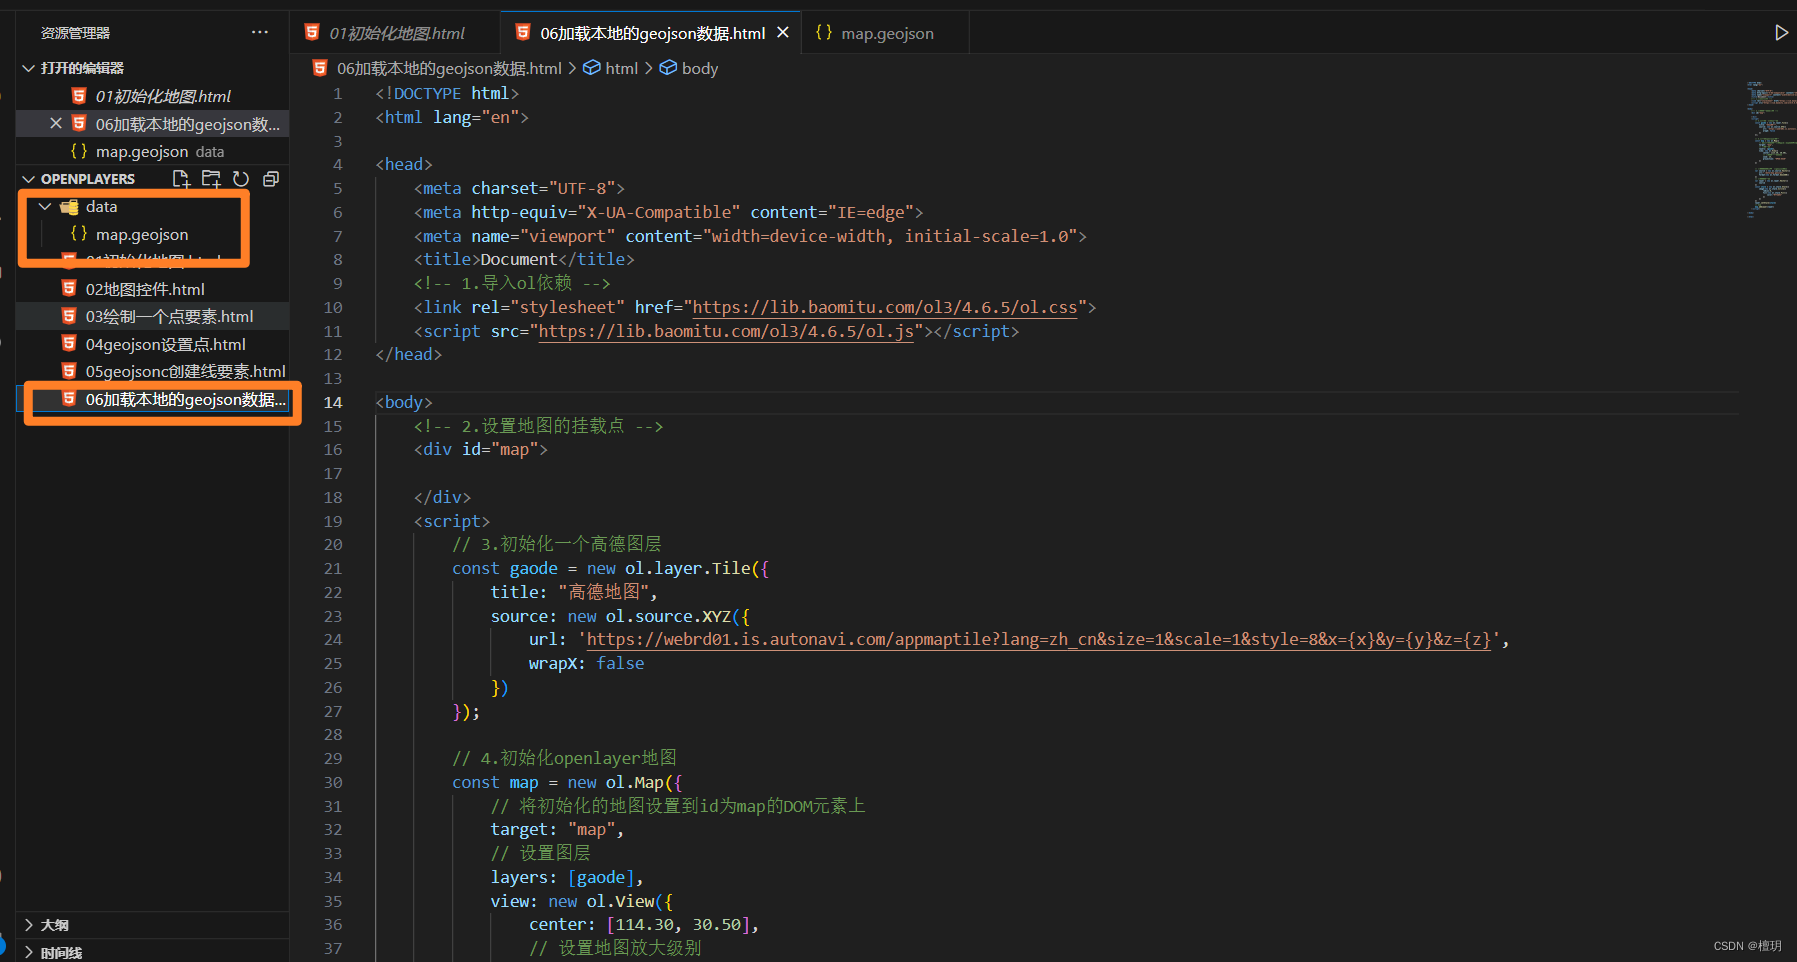
</html>加载本地的geojson数据
<!DOCTYPE html>
<html lang="en">
<head>
<meta charset="UTF-8">
<meta http-equiv="X-UA-Compatible" content="IE=edge">
<meta name="viewport" content="width=device-width, initial-scale=1.0">
<title>Document</title>
<!-- 1.导入ol依赖 -->
<link rel="stylesheet" href="https://lib.baomitu.com/ol3/4.6.5/ol.css">
<script src="https://lib.baomitu.com/ol3/4.6.5/ol.js"></script>
</head>
<body>
<!-- 2.设置地图的挂载点 -->
<div id="map">
</div>
<script>
// 3.初始化一个高德图层
const gaode = new ol.layer.Tile({
title: "高德地图",
source: new ol.source.XYZ({
url: 'https://webrd01.is.autonavi.com/appmaptile?lang=zh_cn&size=1&scale=1&style=8&x={x}&y={y}&z={z}',
wrapX: false
})
});
// 4.初始化openlayer地图
const map = new ol.Map({
// 将初始化的地图设置到id为map的DOM元素上
target: "map",
// 设置图层
layers: [gaode],
view: new ol.View({
center: [114.30, 30.50],
// 设置地图放大级别
zoom: 14,
projection: "EPSG:4326"
})
})
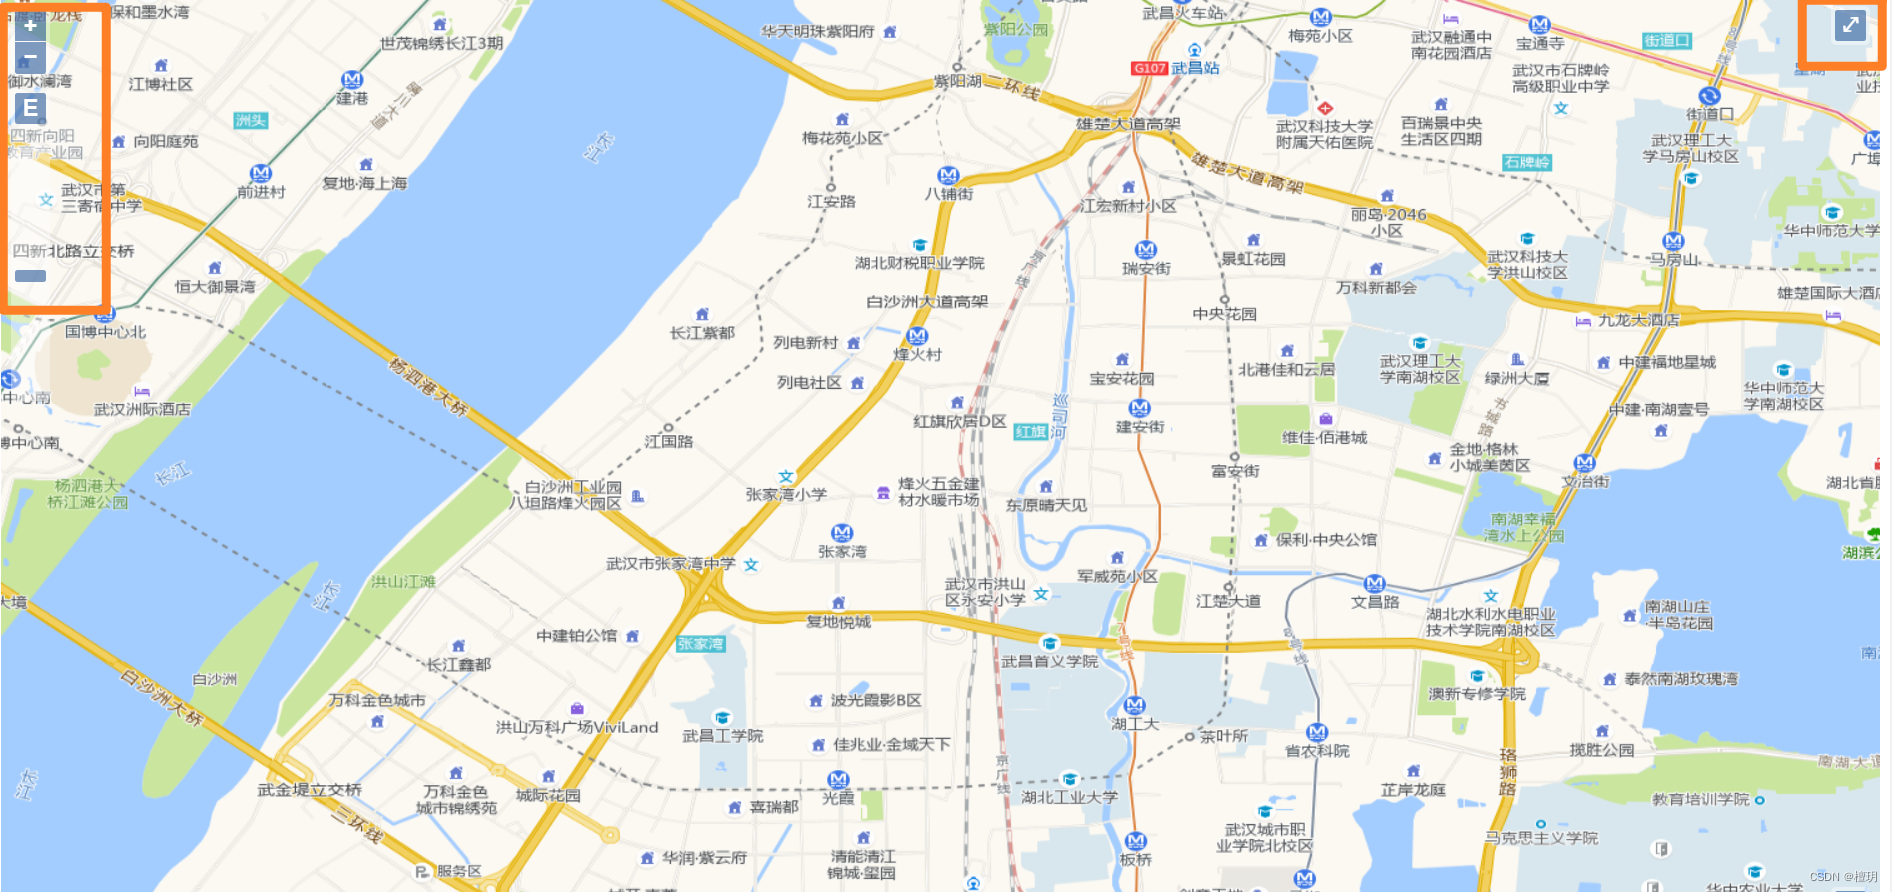
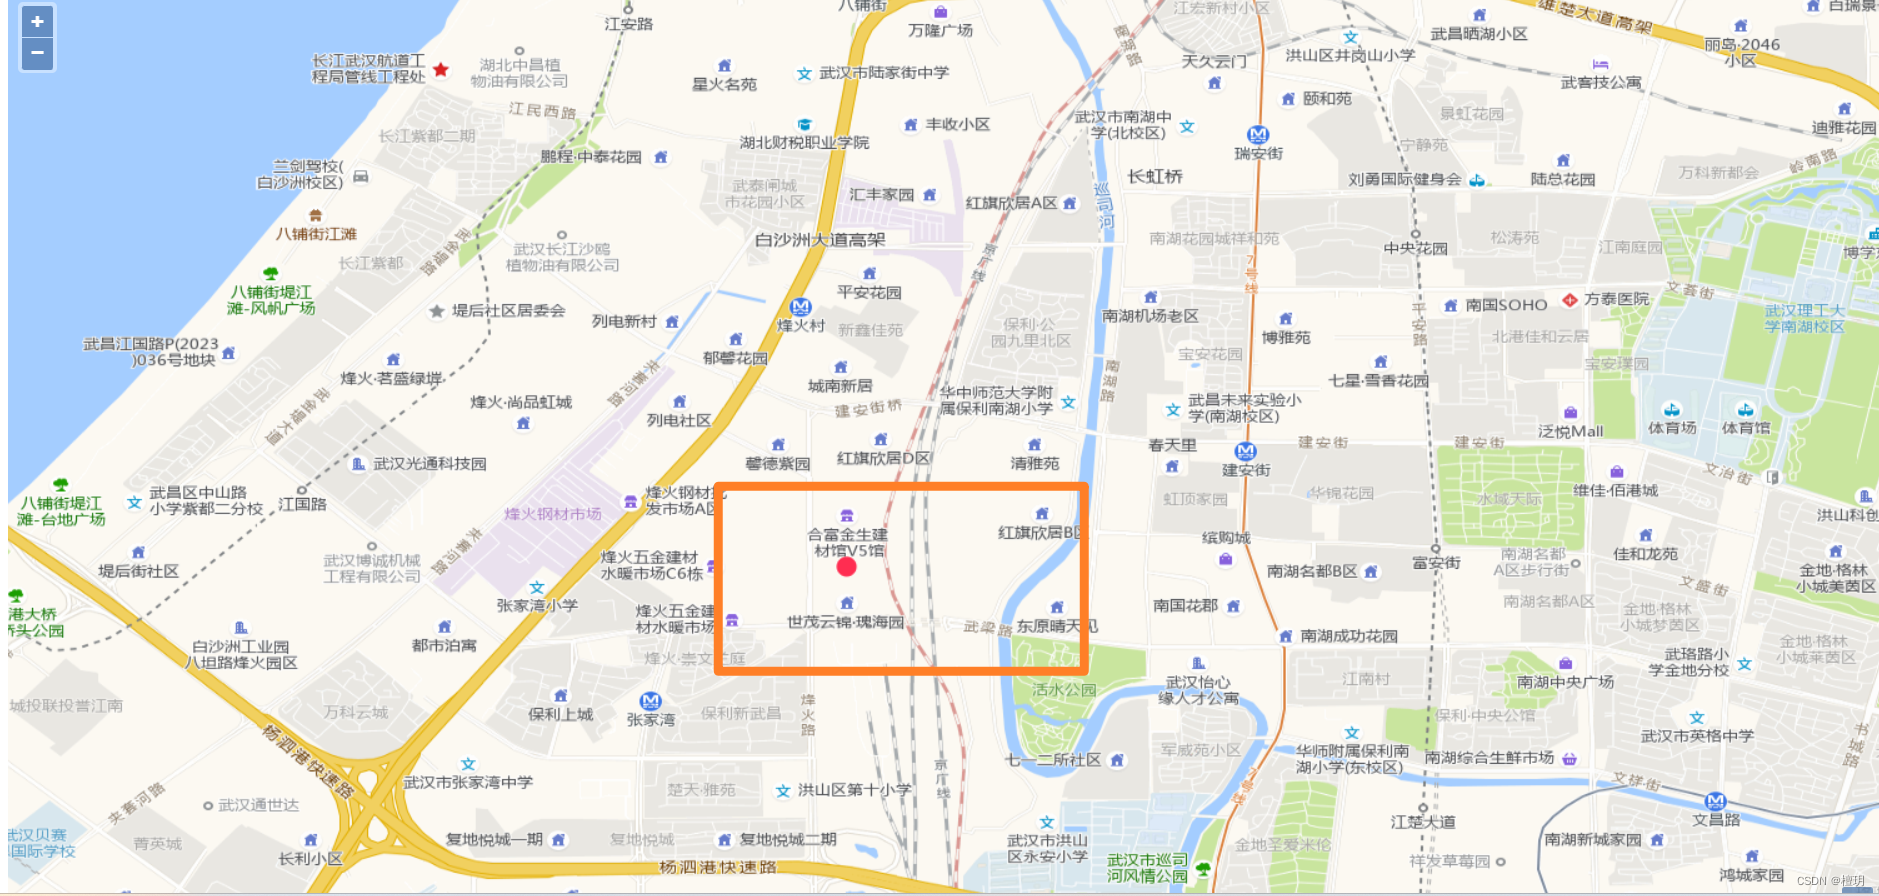
// 设置矢量数据源加载geojson数据
var source = new ol.source.Vector({
url:"./data/map.geojson",
format:new ol.format.GeoJSON()
})
// 设置矢量图层
var layer = new ol.layer.Vector({
source
})
const style = new ol.style.Style({
image:new ol.style.Circle({
radius:8,
fill:new ol.style.Fill({
color:"#ff2d51"
})
})
})
layer.setStyle(style)
// map
map.addLayer(layer)
</script>
</body>
</html>

<!DOCTYPE html>
<html lang="en">

<head>
    <meta charset="UTF-8">
    <meta http-equiv="X-UA-Compatible" content="IE=edge">
    <meta name="viewport" content="width=device-width, initial-scale=1.0">
    <title>Document</title>
    <!-- 1.导入ol依赖 -->
    <link rel="stylesheet" href="https://lib.baomitu.com/ol3/4.6.5/ol.css">
    <script src="https://lib.baomitu.com/ol3/4.6.5/ol.js"></script>
</head>

<body>
    <!-- 2.设置地图的挂载点 -->
    <div id="map">

    </div>
    <script>
        // 3.初始化一个高德图层
        const gaode = new ol.layer.Tile({
            title: "高德地图",
            source: new ol.source.XYZ({
                url: 'https://webrd01.is.autonavi.com/appmaptile?lang=zh_cn&size=1&scale=1&style=8&x={x}&y={y}&z={z}',
                wrapX: false
            })
        });

        // 4.初始化openlayer地图
        const map = new ol.Map({
            // 将初始化的地图设置到id为map的DOM元素上
            target: "map",
            // 设置图层
            layers: [gaode],
            view: new ol.View({
                center: [114.30, 30.50],
                // 设置地图放大级别
                zoom: 4,
                projection: "EPSG:4326"
            })
        })

        // 加载网络geojson数据
        const china_source = new ol.source.Vector({
            url:"https://geo.datav.aliyun.com/areas_v3/bound/100000_full.json",
            format:new ol.format.GeoJSON()
        })
        const china_layer = new ol.layer.Vector({
            source:china_source
        })
        const china_style = new ol.style.Style({
            fill:new ol.style.Fill({
                color:'rgba(50,50,50,0.4)'
            }),
            stroke:new ol.style.Stroke({
                color:"#ff2d5180",
                width:2
            })
        })
        china_layer.setStyle(china_style)
        map.addLayer(china_layer)


        // 湖北
        const huibei_source = new ol.source.Vector({
            url:"https://geo.datav.aliyun.com/areas_v3/bound/420000_full.json",
            format:new ol.format.GeoJSON()
        })
        const huibei_layer = new ol.layer.Vector({
            source:huibei_source
        })
        const huibei_style = new ol.style.Style({
            fill:new ol.style.Fill({
                color:'#333'
            }),
        })
        huibei_layer.setStyle(huibei_style)
        map.addLayer(huibei_layer)
    </script>

</body>

</html>
地图事件及漫游
地图事件及漫游-CSDN直播
<!DOCTYPE html>
<html lang="en">

<head>
    <meta charset="UTF-8">
    <meta http-equiv="X-UA-Compatible" content="IE=edge">
    <meta name="viewport" content="width=device-width, initial-scale=1.0">
    <title>Document</title>
    <!-- 1.导入ol依赖 -->
    <link rel="stylesheet" href="https://lib.baomitu.com/ol3/4.6.5/ol.css">
    <script src="https://lib.baomitu.com/ol3/4.6.5/ol.js"></script>
    <style>
        .btn{
            position: fixed;
            z-index: 100;
            top: 30px;
            right: 50px;
        }
    </style>
</head>

<body>
    <!-- 2.设置地图的挂载点 -->
    <div id="map">

    </div>
    <button class="btn">复位地图</button>
    <script>
        // 3.初始化一个高德图层
        const gaode = new ol.layer.Tile({
            title: "高德地图",
            source: new ol.source.XYZ({
                url: 'https://webrd01.is.autonavi.com/appmaptile?lang=zh_cn&size=1&scale=1&style=8&x={x}&y={y}&z={z}',
                wrapX: false
            })
        });

        // 4.初始化openlayer地图
        const map = new ol.Map({
            // 将初始化的地图设置到id为map的DOM元素上
            target: "map",
            // 设置图层
            layers: [gaode],
            view: new ol.View({
                center: [114.30, 30.50],
                // 设置地图放大级别
                zoom: 14,
                projection: "EPSG:4326"
            })
        })

        // source-layer
        var source = new ol.source.Vector({})
        var layer = new ol.layer.Vector({
            source
        })
        map.addLayer(layer);
        // 给地图绑定一个点击事件
        map.on("click", (evt) => {
            var { coordinate } = evt;
            console.log(coordinate)
            var point = new ol.Feature({
                geometry: new ol.geom.Point(coordinate)
            })
            source.addFeature(point);


            // 实现飞行视角--漫游
            const view = map.getView();
            view.animate({
                center: coordinate
            })
        })


        // 复位按钮
        var btn = document.querySelector(".btn");
        btn.onclick = function () {
            map.getView().animate({
                center:[114.30,30.50],
                zoom:6,
                duration:3000
            })
        }
    </script>

</body>

</html>